
Want to dive into the world of Facebook advertising? Great! In this post, I’m going to teach you how to create your first Facebook ad (using power editor) if you are brand new to the world of paid traffic, or fill in some of those pesky gaps in information which is preventing you from investing in paid traffic.
In the first part of this series, I talked about five key things:
Firstly, I talked about how much budget you need to allocate to an ad. The short answer is it can be as little as $5 a day.
The second thing I clarified was the kinds of goals you can set for an ad campaign. It can be brand awareness, sales or lead generation. For our purposes, the latter is what we are focusing on.
Then I quickly explained how you need to set aside some money to ‘test’ your ad. This is part of the process. You need to figure out which ads are working and which ones to stop.
Lastly, I explained how critical it is to nail your opt-in offer and the landing page. The reason is simple, if you can rule out the possibility that it is your freebie offer that is not working, or that your landing page is not converting, you can confidently focus on the rest of the elements of a high converting ad campaign.
Do check out the first part as it will surely help with setting your Facebook strategy. At the end of the day, you must know why you are doing certain things. You have got to understand the principles and only then you can employ tactics wisely.
All right, now you are ready to actually start creating the ad. I’d like to do two more things BEFORE I even open my Facebook. Finish the ad creative.
Write a compelling ad
Think about about your newsfeed for a second. You are browsing fast through a bunch of posts, images, videos and links that appear on your timeline. Why do you do this in the first place?
Well … it might be that you have to kill some time stuck in traffic or waiting for your kids to return from a soccer game. Maybe you are too tired and just want to relax your mind a bit. You want to know if your friend uploaded pics of her recent Bali trip. You may even want to know what’s the latest meme that is going viral.
When was the last time you opened Facebook thinking you need to find a life coach? When was the last time you said, ‘oh, let me grab my wallet as I may find something I’d like to buy’? Umm – never.
You are on Facebook for entertainment, to socialize or even learn something new. You are not looking to buy. Now flip this around. This is the mindset of your ideal audience when they are on Facebook.
They are tired, busy or distracted. And their newsfeed is busy. You have got to get their attention and get them to click on your ad. This requires copy that speaks directly to them – words that resonate with them.
You can’t write like a direct response copywriter on Facebook. You have to work within the context of this social media platform.
Be conversational. Use words that your ideal audience would use themselves. Use interesting images that go well with your ads but also stand out in the newsfeed (Using a pretty girl in a bikini is not one of them, unless you are selling swimwear. Sure, it will stand out but will it make people click and opt in to what you have to offer? I think not.)
In order to write copy that gets your ideal audience to click on your ad, you must really know them well in the first place. If you aren’t really sure then you certainly need to work on that first.
You can borrow some of the words you used on your landing page, for sure. This is actually a good practice because once they click over and go over to the landing page, it is all very congruent and they feel like they have landed on the right page.
Your copy can be short or it can be long. This is one of the things you will need to test for yourself. So may run an ad with long copy and another one with short and see which one is getting your cheaper leads.
Once you are ready with your ad copy, image and the landing page, you can start creating your ad.
Setting up your ad
In order to run Facebook ads, you need a personal profile as well as a business page. You can use the GetResponse Facebook Ads tool, your ads manager to set up the ad or use power editor, a chrome-extension tool that is more advanced and offers more functionality.
For example, have you seen those ads where there is a lot of text and you wonder how do they fit in so many extra words? Well, those ads are created in power editor.
Power editor used to be clunky and hard to navigate but now I find it much easier to use. So I will teach how to set up your ad in there. And once you get the idea, you can easily use your ads manager to do that as well, if necessary.
The first thing you will need to do is to download power editor. It’s a basically a plugin that works with chrome so you would have to use the chrome browser for your ad creation purposes.
You can go directly to power editor by clicking here. Or, you can also go to your ads manager and you will see it on the top.
Now the first thing you want to do is put a Facebook pixel on your website. You don’t need to do anything with it now but trust me when I say this, you’ll be kicking yourself down the road if you skip this step. What this pixel does is that it allows you to retarget all your website visitors by creating a website custom audience.
I strongly recommend that you either find out how you can do this yourself or simply ask someone to do this. Just ask them to place the Facebook pixel between the head tags and you’ll be good to go. Done? Moving on …
Before we dive into ad creation, I want to talk a bit campaigns, ad sets and ads.
- A campaign lets you choose the objective for your ad, for example website clicks or conversions.
- An ad set lets you set the budget and schedule of your ad, choose the placement, bidding and the audience.
- And at the ad level you create the copy and add the image and the link.
Now let’s do this:
Open the power editor and simply click on the “ + Create Campaign “ button on your top left just under manage ads.
Once you click there, you will see a box pop up like this:
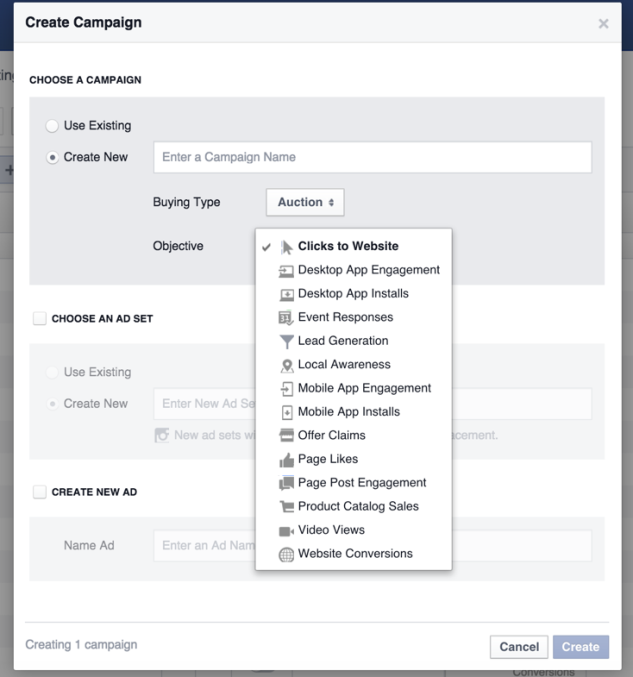
Firstly, name your new campaign (leave the buying type set to auction).
Now you need to select your campaign objective. This is what confuses most people.
Since our goal is to build your email list, you would choose ‘website conversions’.
Now click on the little box that says choose your ad set, and name a new ad set and do the same for the ad. Keep it simple and click ‘create’.
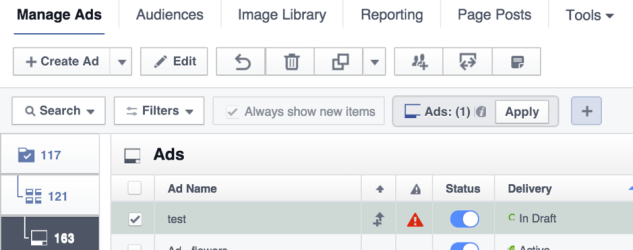
Once you have done that, you should be able to see something like this:
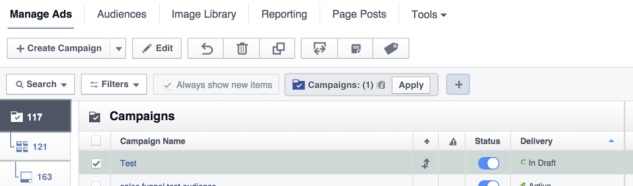
For your first ad, you will see 1 on the left. I have run 117 campaigns on my own account so this is what you see here. It shows your campaign’s status to be on but ‘in draft’.
You don’t need to do anything else with the create campaign, so go ahead and click on the ‘ad set’. This is right under your campaign (121 in this example). Once you click on it and now you are working on the ad set level, click on the edit box right next to the ‘ + Create Ad Set ‘.
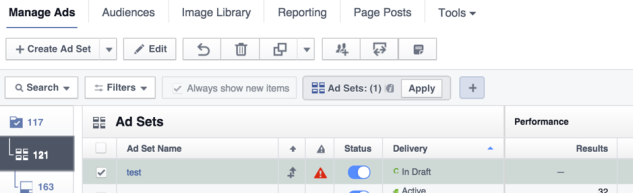
if you hover your mouse over the red error before status, you’ll see that it is asking you to choose a conversion pixel.
A conversion pixel is just a bit of you code you need to place on the thank you page. This lets Facebook know how many people have hit the thank you page and let you know the number of conversions and the cost per conversion.
This is super important. If you don’t place the conversion pixel, you have no idea of how many people are opting in and how much are you paying for subscriber.
Facebook has recently changed their pixels and introduced a new Facebook pixel. Teaching you how to choose a pixel to track your conversions is outside the scope of this post but I’ll be sure to cover this in another post.
You could simply ask someone to do it for you or Google and learn to do it yourself.

Let’s say you have already set up a conversion pixel. Click in the box that says ‘Choose a conversion event’ and your pixel should pop up. Just select it and the red error will disappear.
Next set your daily budget, in our case $10.
Under schedule, either schedule or select run as ongoing. I recommend starting your ads in the morning because Facebook uses the daily budget not for a period of 24 hours, but for the remaining hours in that dy. So if you started at 7pm, it would use up $10 by midnight.
When you scroll down, you’ll be prompted to select the audience and the placement of your ad.
Now targeting of your ad is SUPER CRITICAL and is a HUGE topic in itself. Who to target and how big your audience size needs to be are the two questions that will get you a million different answers.
If you are choosing to spend $10 a day, I’d recommend an audience size of 100K to 200K. This works well for me for this budget.
And I also recommend interest targeting, meaning targeting pages of your competitors and people in the same space as you. You can do that by clicking on ‘edit audience’, choosing the countries you want to target, the demographics and when finally plugging in different pages to see what comes up. Then choose a page. Don’t forget to save your audience for your next ad.
I recommend testing with one audience per campaign just to keep things simple.
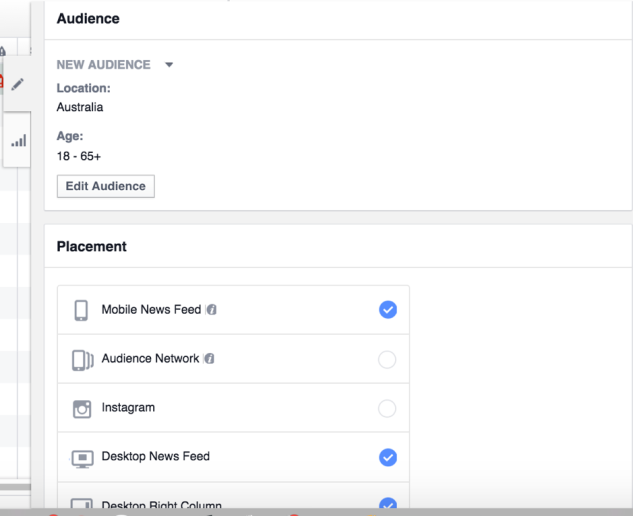
For placement, I usually do newsfeed but you can click more placements like desktop newsfeed and desktop sidebar.
And when you scroll down further, the last thing is the pricing.
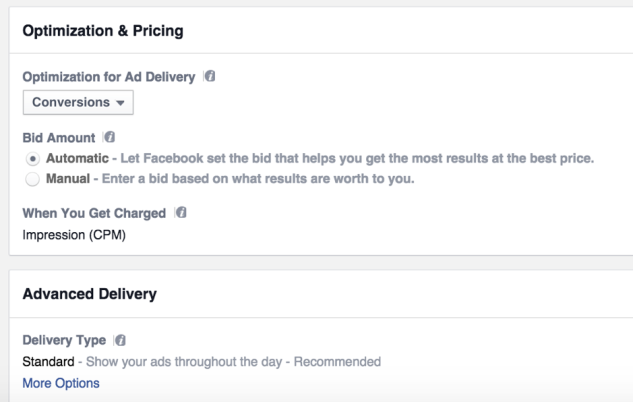
Click on automatic so Facebook can optimize the ad delivery for you.
The ad
Choose the box under the ad set on your far left and click on edit right next to ‘ + Create Ad’.
Once you click the edit button, a new box will pop up.
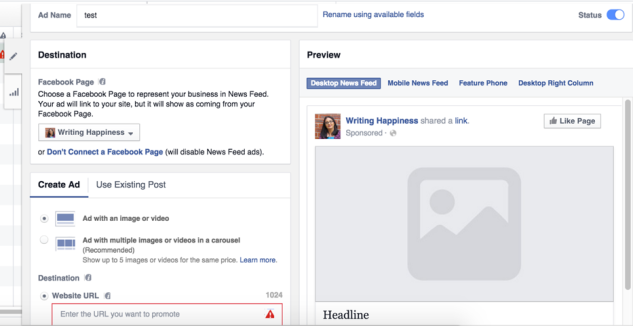
The first thing you need to do is select your page. You see mine in this example.
Next, choose the ‘ad with an image or video’ option and put in the name of the URL you will be sending traffic to. This is the landing page where people will sign up.
Now this is my most favorite part of using power editor. See where it says ‘Text’, here you can write as much as you like. This is what appears just above the image. With your basic ads manager, you have a number limitation.
Underneath you will create your headline and you can see where that appears in the preview.
Finally, you can put in additional text that appears under the description.
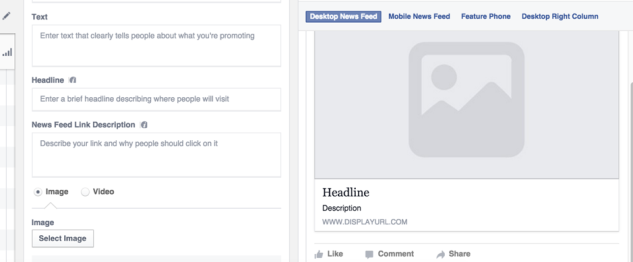
Once you have plugged in your copy, select on the image and upload it.
The last thing you are required is to select a call to action. I recommend using ‘download’ if you are offering a PDF.
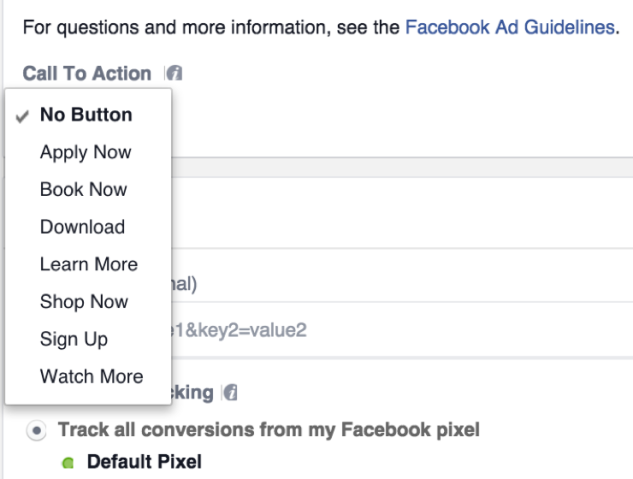
It will also confirm that you are tracking conversions using your Facebook pixel. That’s it!
Go to the top right right corner of your power editor and click review changes.
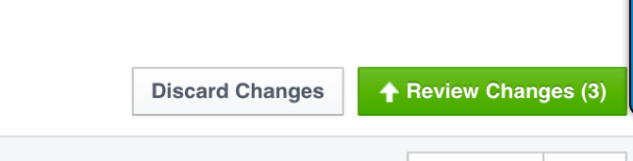
Follow the prompts and submit your ad. It will take a bit of time for your ad to be approved but in most cases, it is approved under 30 minutes. And you are all set.
What do you think?
Phew! That was a lot of information to digest but I’m glad that you have made it this far.
I have given you tons of things to consider before you start running an ad and also the simplest path to setting up an ad in power editor. You may need help with things along the way but in a nutshell this is the process you need to follow to DIY this process.
Take a moment to leave a comment and let me know if you found this useful. What insights have you gotten and are your ready to create your first ad?
All the best!